Inpainting
Inpainting redraws only the painted area (the mask); pixels outside it don’t change at all. It’s suited to fixing hands, faces and small objects, or replacing part of an image.
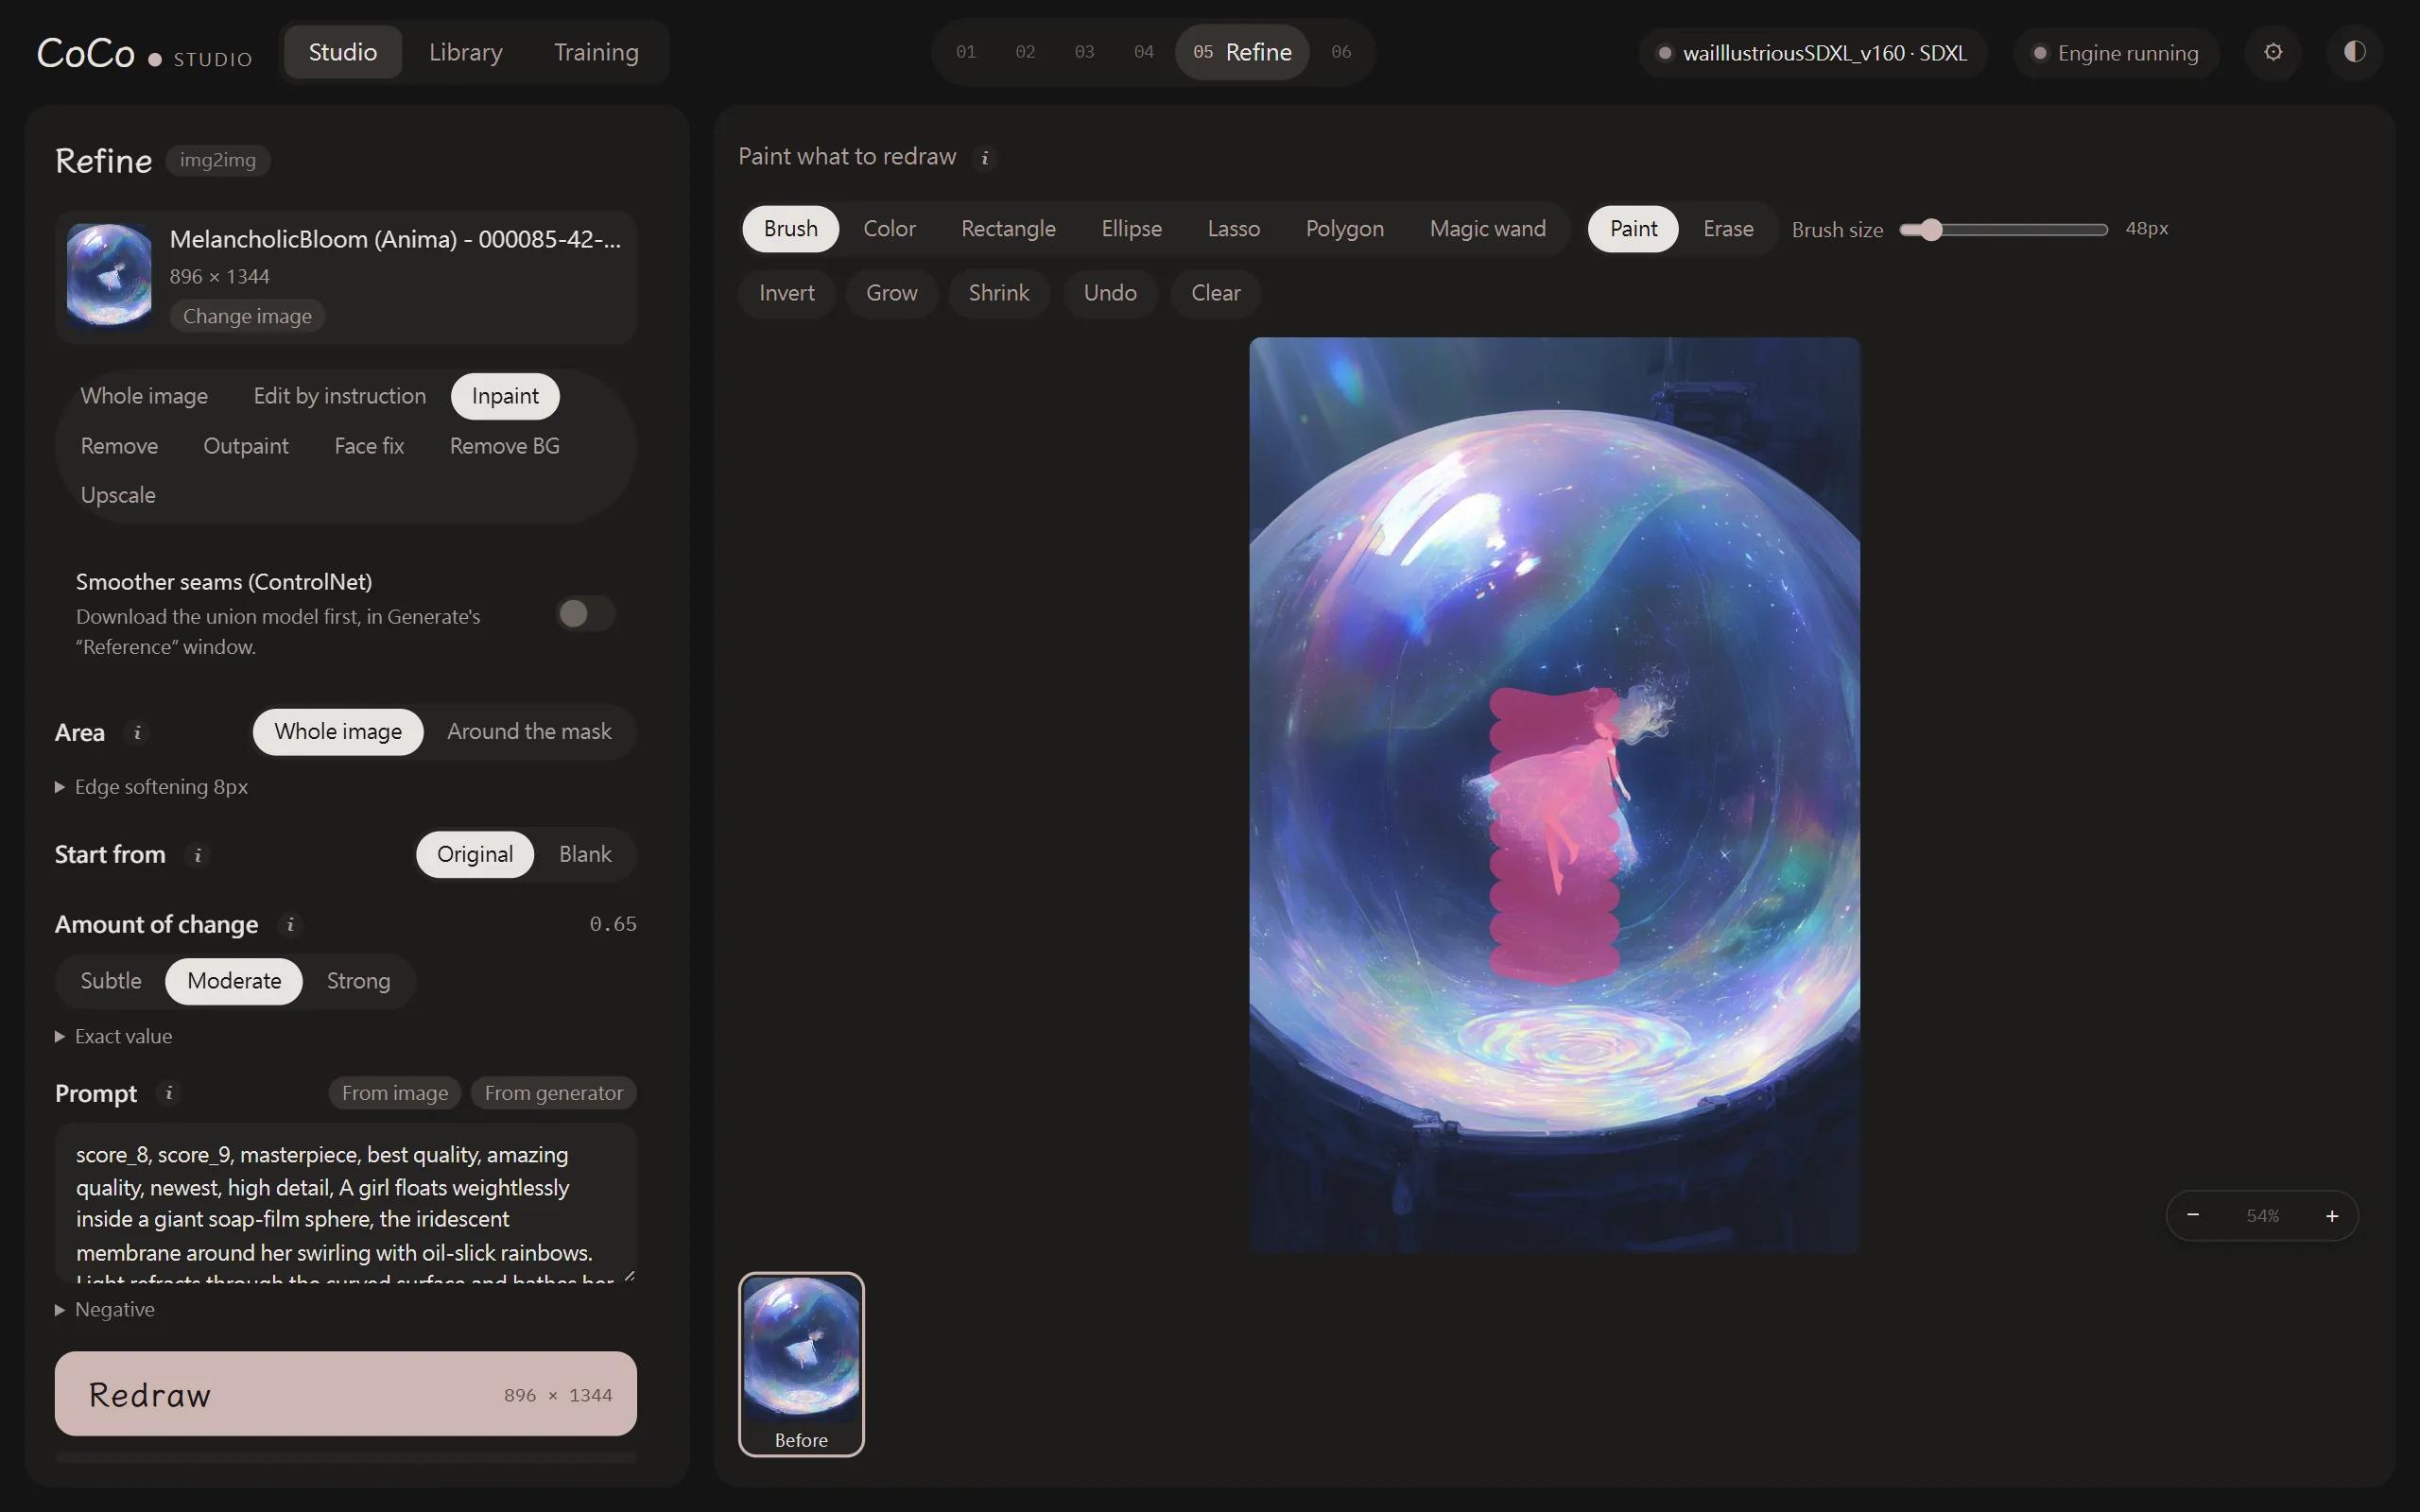
Basic steps
Section titled “Basic steps”- Choose “Inpaint” as the refine mode.
- Paint the area to redraw on the image on the right.
- Describe in the prompt what this area should become.
- Choose the amount of change and press “Redraw”.
Mask tools
Section titled “Mask tools”| Tool | Shortcut | Description |
|---|---|---|
| Brush | B | Paint freely |
| Rectangle | R | Drag a rectangle; hold Shift for a square |
| Ellipse | O | Drag an ellipse; hold Shift for a circle |
| Lasso | L | Drag to draw around an area |
| Polygon | P | Click each corner; click the start point, double-click or press Enter to close, Esc to cancel |
| Magic wand | W | Click to select a connected area of similar colour; hold Shift to select similar colours across the whole image. Higher “Tolerance” selects a wider range |
| Color | C | Paint colour as the starting point for redrawing (see the next section) |
Every tool can paint or erase: press E to switch, or hold Alt to reverse it temporarily.
| Action | Description |
|---|---|
| Invert (I) | Swaps painted and unpainted areas |
| Grow, Shrink | Expands or contracts the mask by 8 pixels |
| Undo (Ctrl+Z) | Undoes the last step |
| Clear | Clears the whole mask |
| Brush size | [, ] or Shift + scroll |
| Option | When to use |
|---|---|
| Whole image | The model sees the whole image and only the painted area changes. Suited to large changes that need to match the whole image |
| Around the mask | Only the area around the mask is enlarged, redrawn and scaled back, giving more detail. Suited to faces, hands and small objects. Describe only the painted area in the prompt for best results |
“Edge softening” softens the mask edge by a few pixels so the seam is less visible.
Start from
Section titled “Start from”| Option | Description |
|---|---|
| Original | Redraws starting from the existing content; composition and colours carry over |
| Blank | Smooths the area with surrounding colours before redrawing; suited to removing objects. “Moderate” or stronger is recommended |
Painting colour as a starting point
Section titled “Painting colour as a starting point”To change an area to a specific colour (for example, red clothing), paint the colour directly onto the image with the “Color” tool and redraw:
- Painted colour is also added to the mask, so it only appears inside the mask.
- Hold Ctrl and click the image to pick a colour.
- Works best with “Original” and “Moderate”.
Removing objects
Section titled “Removing objects”Choose “Remove” as the refine mode to remove unwanted objects:
- Paint over the object.
- “What to remove” is optional; if filled in, use English tags separated by commas. These are added to the negative prompt, and prompt tags that mention them are skipped (the prompt field itself isn’t changed).
- In the prompt, describe what should be there afterwards (for example
wall,sky), not the object you’re removing. - Press “Redraw”.
Remove always uses “Blank” and the whole image. Recommended amounts:
| Level | Description |
|---|---|
| Subtle | Conservative; may leave a blurry trace |
| Moderate | Suits most cases |
| Strong | Complete redraw; the cleanest, but edges may look less natural |
Smoother seams (ControlNet)
Section titled “Smoother seams (ControlNet)”With SDXL-family models, Inpaint, Remove and Outpaint can turn on “Smoother seams”. It redraws with reference to the surroundings, so seams look more natural and unrelated things are less likely to appear. It adds about 3 seconds per image.
It needs the union model, which you can download in the generate panel’s “Reference” window (see Reference images).