Layer editor
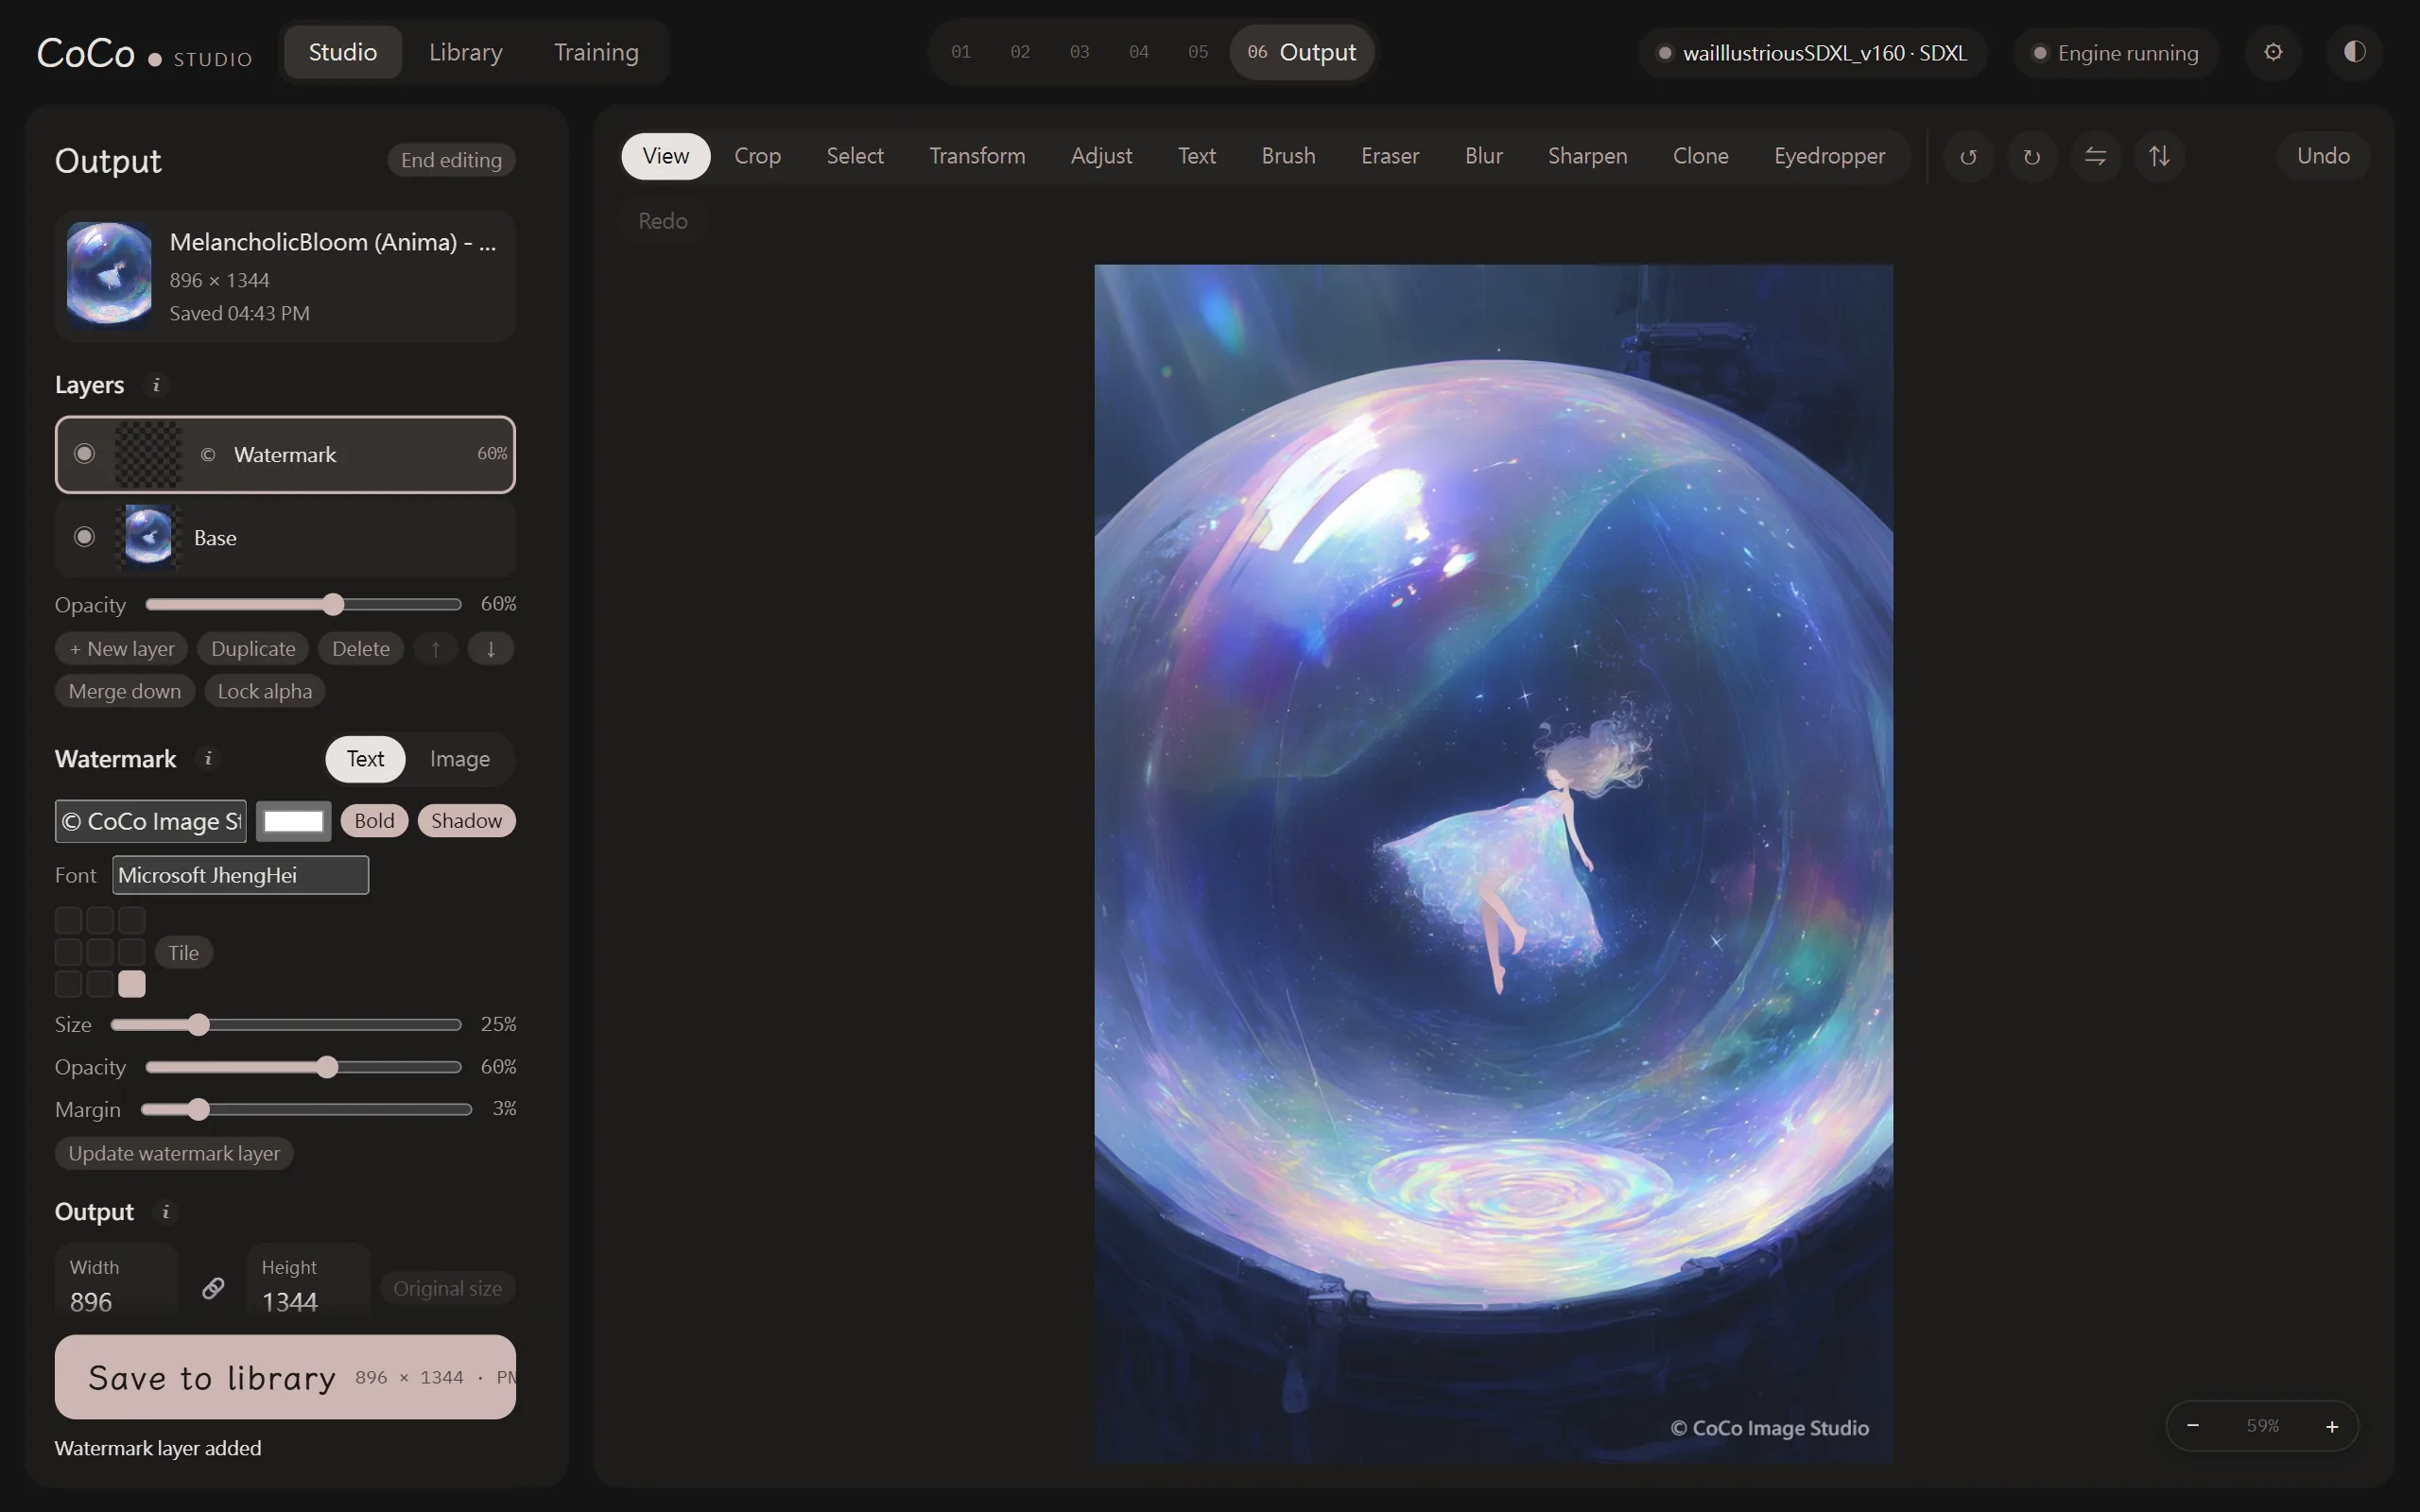
Output is the last step in the studio: use the layer editor to crop, retouch and add text or a watermark, then export to a file. The original image is never changed.
Opening the editor
Section titled “Opening the editor”- Press “Edit” in the library, the image viewer or the Refine page.
- Work in progress is saved automatically. Choose “Output” in the step bar to continue from “Unfinished edits”; opening the same image again asks whether to “Continue editing” or “Discard and start over”.
Layers
Section titled “Layers”Every change applies to the selected layer. “Duplicate” the base layer before changing it and the original always stays intact; if something goes wrong, delete that layer.
| Action | Description |
|---|---|
| + New layer | Adds a blank layer |
| Duplicate | Duplicates the selected layer |
| Delete | Deletes the selected layer |
| Move up, Move down | Change the layer order |
| Merge down | Merges the selected layer into the one below |
| Show / hide, Opacity | Control how the layer is shown |
| Lock alpha | When on, brush, clone, blur, sharpen and fill only change colour; transparent areas stay transparent |
Click the selected layer’s name to rename it. Undo is Ctrl+Z; redo is Ctrl+Y or Ctrl+Shift+Z.
| Tool | Shortcut | Description |
|---|---|---|
| View | V | Drag to move the view when zoomed in |
| Crop | C | Drag an area, adjust the corners, press Enter to apply. Ratios: Free, Original, 1:1, 4:5, 3:4, 2:3, 9:16, 16:9, 3:2 |
| Brush | B | Alt+click to pick a colour; [, ] or Shift + scroll to resize |
| Eraser | E | Erases to transparent (selected layer only) |
| Blur, Sharpen | R, S | Blurs or sharpens where you paint |
| Eyedropper | I | Click to pick a colour; a magnifier shows the sampled spot |
| Select | M | Rectangle, ellipse, lasso, polygon, magic wand |
| Transform | T | Move, scale, rotate or flip the selection (the whole layer when nothing is selected) |
| Adjust | A | Brightness, contrast, saturation, hue |
| Clone | K | Clone stamp: Alt+click to set the source, then paint elsewhere |
| Text | X | Click the canvas to add text |
Whole-image rotation and flipping: “↺ Rotate left”, “↻ Rotate right”, “⇋ Flip horizontal”, “⇅ Flip vertical”.
With a pen tablet, “Pressure” can control size and opacity, and the eraser end of the pen erases directly.
Selecting
Section titled “Selecting”- “New selection”, “Add” and “Subtract” decide how a new selection combines with the current one; you can also hold Shift (add) or Alt (subtract) before you start drawing.
- With a selection you can “Delete”, “Fill”, “Copy to layer” (Ctrl+J), “Cut to layer” (Ctrl+Shift+J) or “Crop to selection”, and adjust it with “Grow”, “Shrink” and “Feather”.
- While something is selected, brushes only paint inside the selection.
- Select all is Ctrl+A, deselect is Ctrl+D, invert is Ctrl+I.
Transform
Section titled “Transform”| Mode | Description |
|---|---|
| Free | Move, scale (corners keep the ratio; hold Shift to not keep it), rotate (hold Shift for 15° steps), flip, or enter numbers |
| Distort | Drag each corner separately (perspective); drag an edge’s midpoint to skew |
| Warp | Drag grid points to bend the image into shape |
Distort and Warp need Chrome or Edge.
Adjust
Section titled “Adjust”Drag the sliders to preview; press “Apply” (Enter) to keep the change. With a selection, only the selected area changes.
Clone stamp
Section titled “Clone stamp”- With “Aligned” on, every stroke keeps the same offset as the first; with it off, every stroke starts again from the source point.
- With “Clone samples” set to all visible layers combined, you can paint on a new blank layer, which makes changes easier to undo.
Click the canvas to add text, click existing text to edit it, and drag to move it. You can set the font (press “Load installed fonts” to read the fonts on your computer), size, colour, bold, italic, alignment, outline and shadow.
Text layers stay editable after saving; once changed with a brush, transform or similar tool, they become normal layers.
Copy and paste
Section titled “Copy and paste”- Ctrl+C / Ctrl+X also copy to the system clipboard, so you can paste into other apps.
- Ctrl+V pastes: content copied inside CoCo goes back to its original position; images copied from other apps, or dragged onto the canvas, become a centred new layer (scaled down if too large).
Watermark
Section titled “Watermark”Set up the “Watermark” section once and use it for every image and for batch export.
- Type: text, or an image (a transparent PNG works best).
- Position: any of the nine positions, or “Tile” (repeated diagonally across the whole image).
- Size, opacity, margin and angle can be adjusted.
“Add to this image” adds a “Watermark” layer at the top, whose opacity you can still change, hide or delete. After changing the watermark settings, press “Update watermark layer” to redraw it.
Exporting
Section titled “Exporting”The visible layers are merged and saved as a new file; the original isn’t changed.
| Item | Description |
|---|---|
| Width, Height | Output size; “Lock ratio”, or press “Original size” to restore |
| File type | PNG, JPG, WebP; JPG and WebP have a quality setting |
| Save to | “Library” or “Another folder” |
| Keep generation parameters | Always kept when saving to the library; can be turned off when exporting to another folder (for example when sharing publicly) |
Press “Save to library” or “Export”. The file name format can be changed under “Output edits” in ⚙ Settings → Generate → File names.
After exporting, the working file (all layers) is kept so you can continue later. “End editing” deletes it; images already exported aren’t affected.
Saving as .kra
Section titled “Saving as .kra”The “Project file” section works with Krita:
- “Save as .kra”: saves a file Krita can open, keeping layers, opacity, visibility and lock alpha.
- “Open .kra”: continue editing from a .kra. A .kra saved by CoCo reconnects to the original image and its text layers stay editable; a .kra saved by Krita opens too, and its merged image is first saved to the library.
Batch export
Section titled “Batch export”Select several images in the library and press “Batch export” in the action bar to export them all with the same settings:
| Item | Description |
|---|---|
| Size | Original, Long side (in pixels) or Scale (percentage) |
| File type | PNG, JPG, WebP |
| Parameters | Whether to keep generation parameters |
| Add watermark | Uses the “Watermark” section’s settings |
Press “Stop” to stop partway.